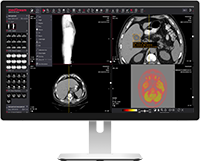
Software Vendors & OEMs
Ready to integrate web DICOM PACS Viewer and connectivity solutions

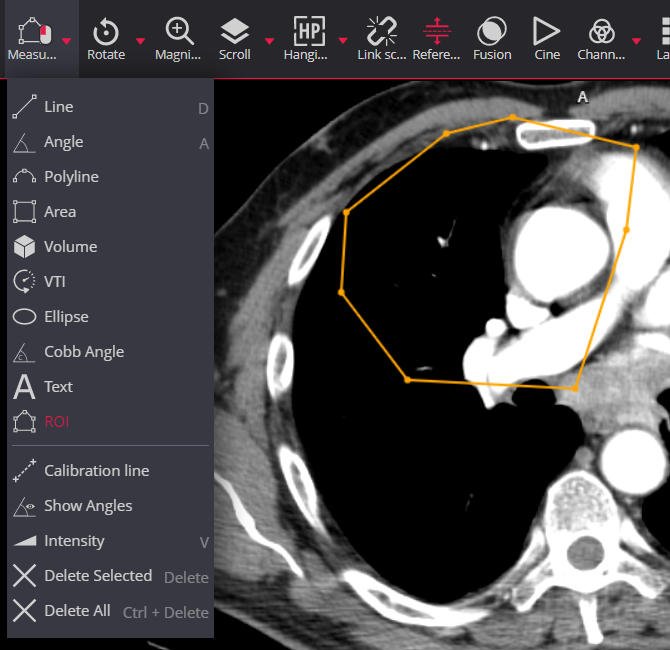
The MedDream DICOM Viewer’s radiology measurements are:
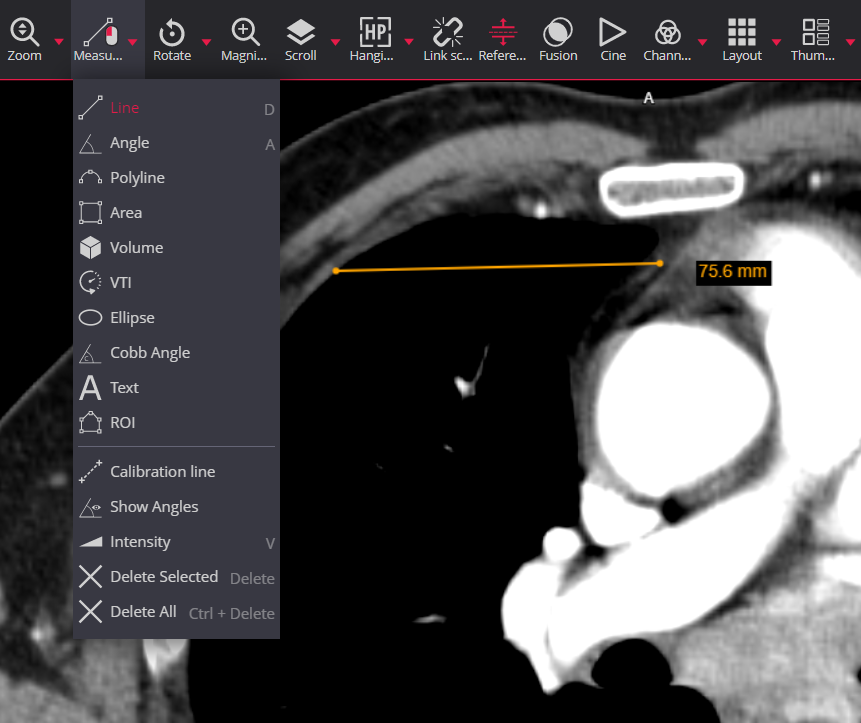
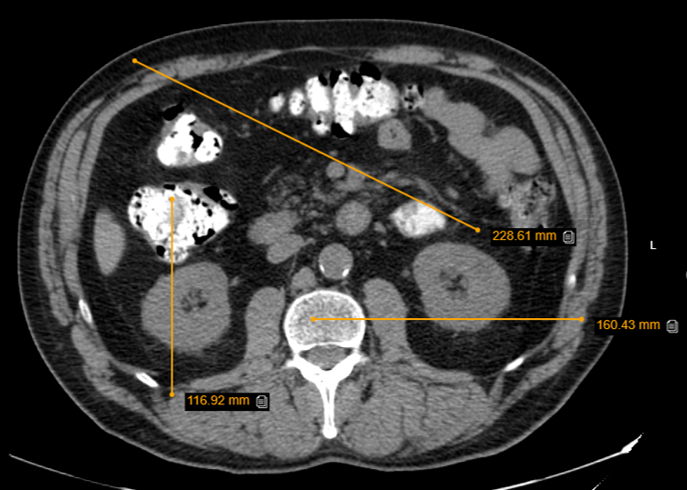
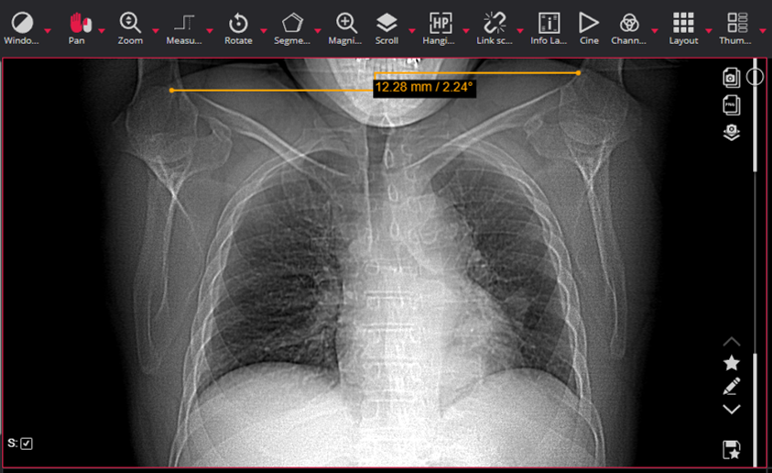
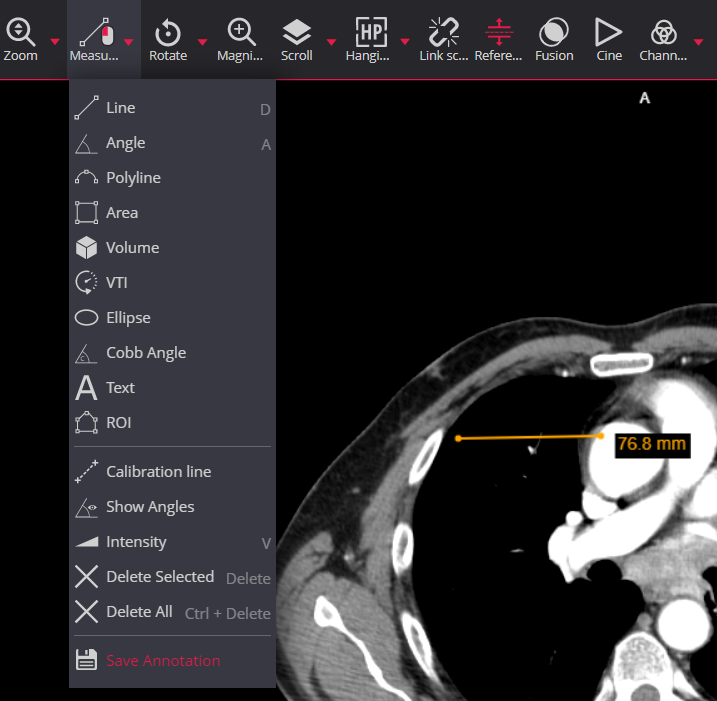
 Line
Line 
Toolbar > Measure > Line. Measure the Line, the distance between two points:
Possibility to align the line vertically or horizontally while drawing by holding ALT button pressed:
Watch the video tutorial on how to measure the line with DICOM Viewer:
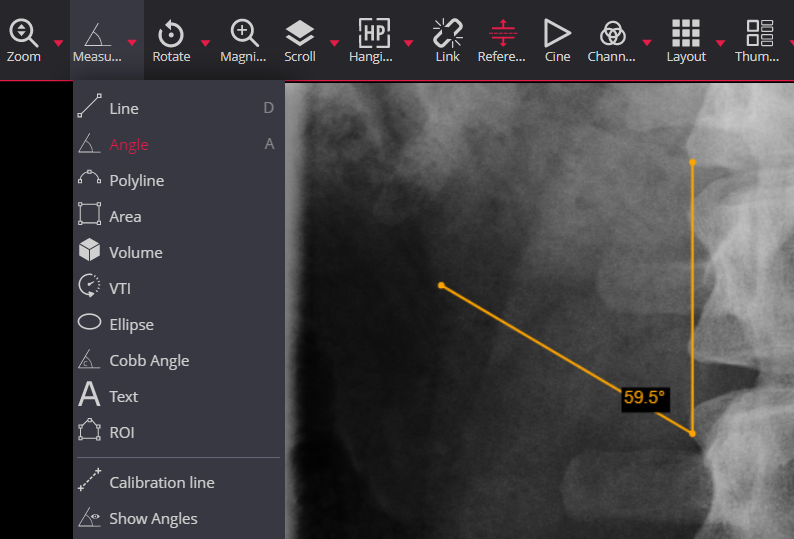
 Angle
Angle
Toolbar > Measure > Angle. Measure the angle between three points:
Watch the video tutorial on how to measure an angle with DICOM Viewer:
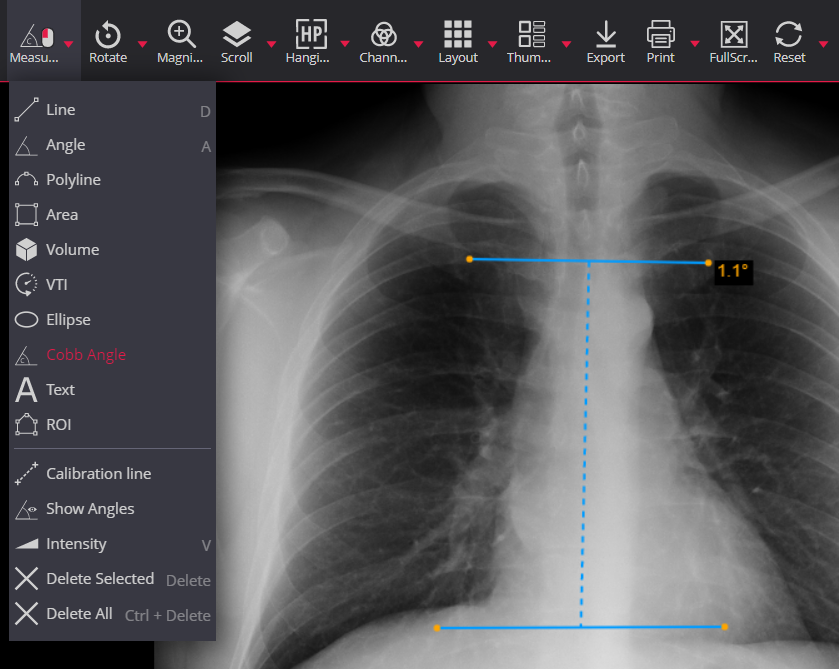
 Cobb angle
Toolbar > Measure > Cobb Angle. Cobb angle measurement between two lines:
Watch the video tutorial on how to measure the Cobb angle with DICOM Viewer:
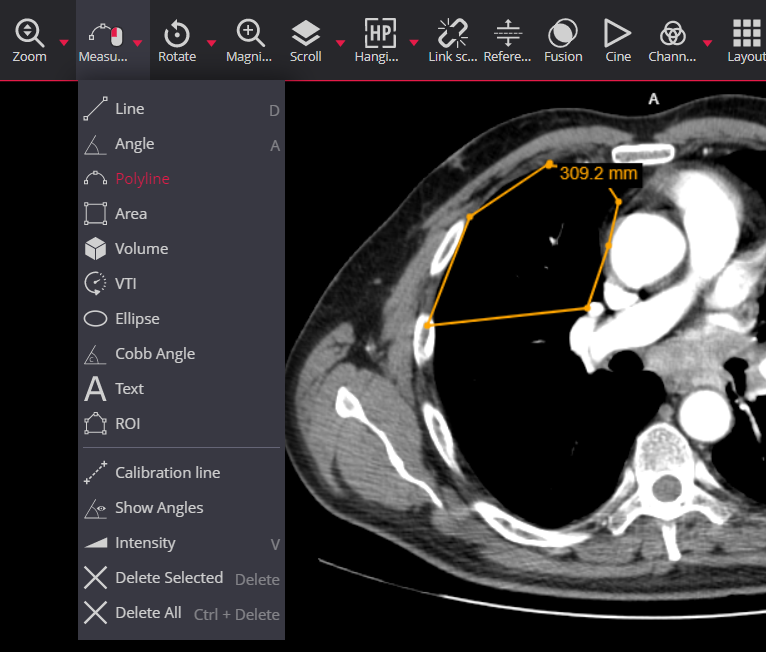
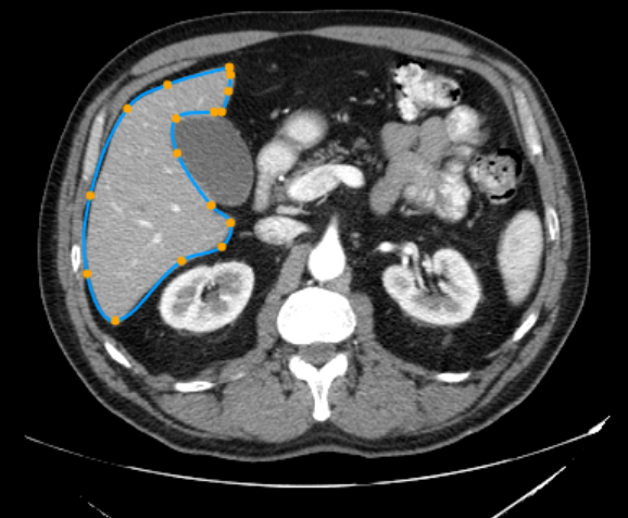
 Polyline
Toolbar > Measure > Polyline. The Polyline button is used to measure the perimeter of a region of interest:
Watch the video tutorial on how to measure the polyline with DICOM Viewer:
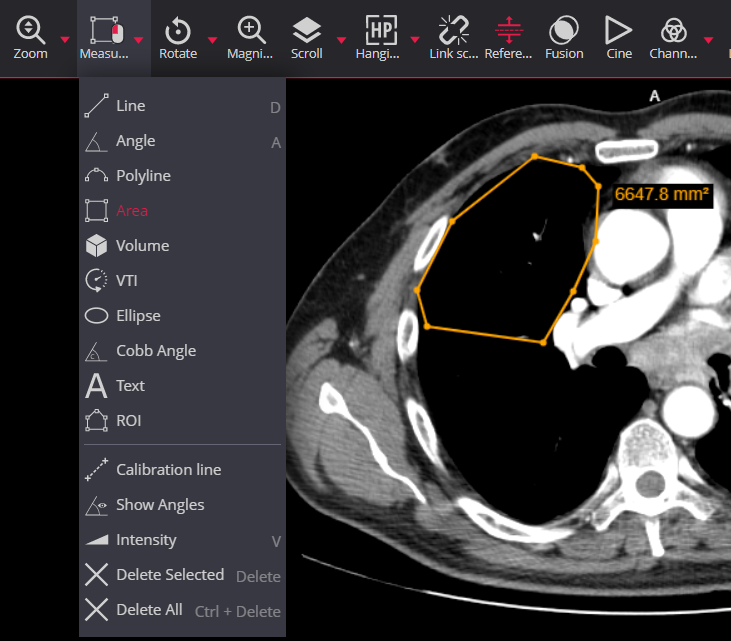
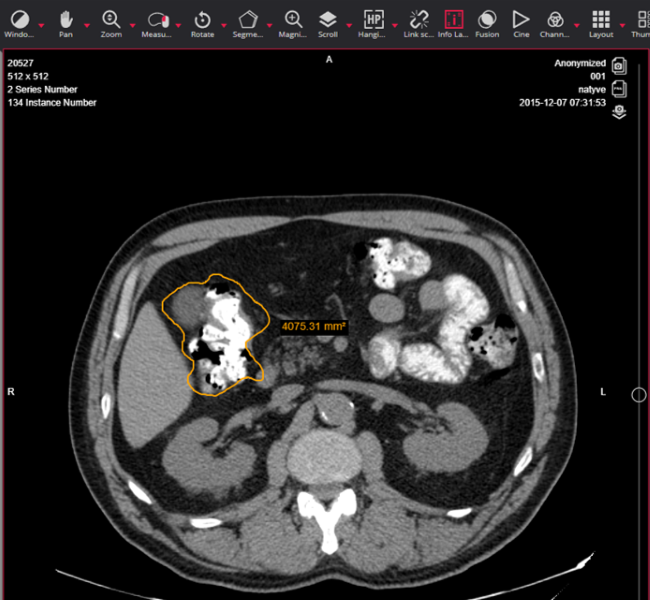
 Area
Area
Toolbar > Measure > Area. The Area button is used to measure the area of a region of interest:
Watch the video tutorial on how to measure the area with DICOM Viewer:
 Ellipse
Toolbar > Measure > Ellipse. Draw and measure the Ellipse:

Watch the video tutorial on how to measure the ellipse with DICOM Viewer:
Ellipse is used to measure area, length, width, Min and Max brightness in HU units and STD measurement in cm. STD average value and standard deviation of pixels in a square area of 10 by 10 mm.
Read about the possibility to Propagate an Ellipse ROI into other open viewports.
 Rectangle
Toolbar > Measure > Rectangle. Measure a rectangle area, min, max, mean, and standard deviation values in HU:

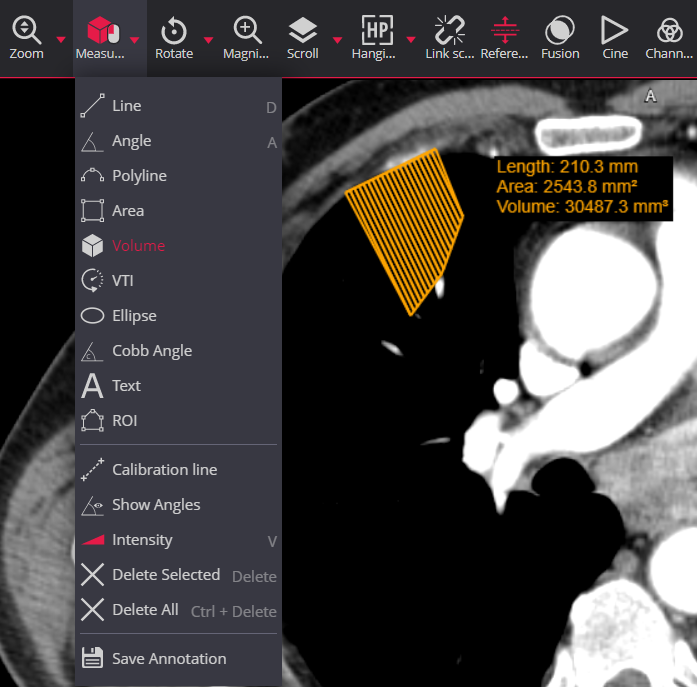
 Volume
Toolbar > Measure > Volume. Volume measurement using circles created from a set number of points:
Watch the video tutorial on how to measure the volume with DICOM Viewer:
 Height Difference
Toolbar > Measure > Height Difference. Measure the vertical distance and angle between the horizontal line and the line connecting the points:
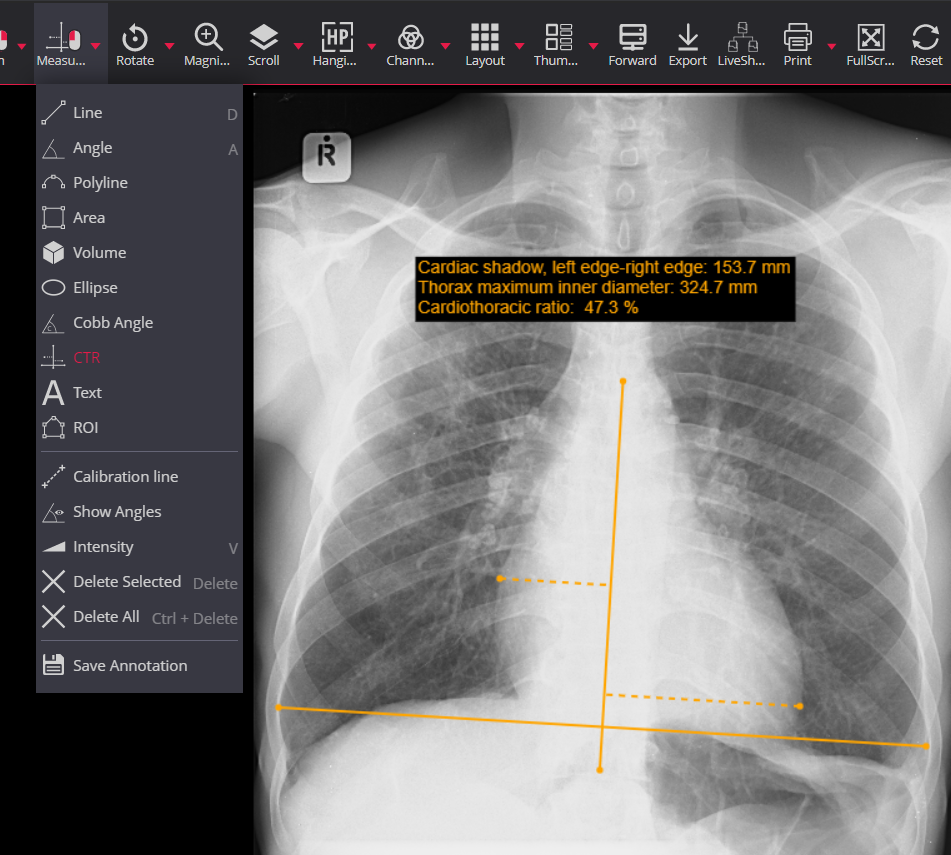
 CTR (cardiothoracic ratio)
Toolbar > Measure > CTR (cardiothoracic ratio). CTR to measure a cardiothoracic ratio to estimate a heart size:
Watch the video tutorial on how to measure the cardiothoracic ratio with DICOM Viewer:
CTR measurement is used to measure the ratio of maximal horizontal cardiac diameter to maximal horizontal thoracic diameter and aids in the detection of enlargement of the cardiac silhouette.
 Flatfoot
Toolbar > Measure > Flatfoot. Measure the longitudinal arch of the foot to detect the longitudinal flatfoot:
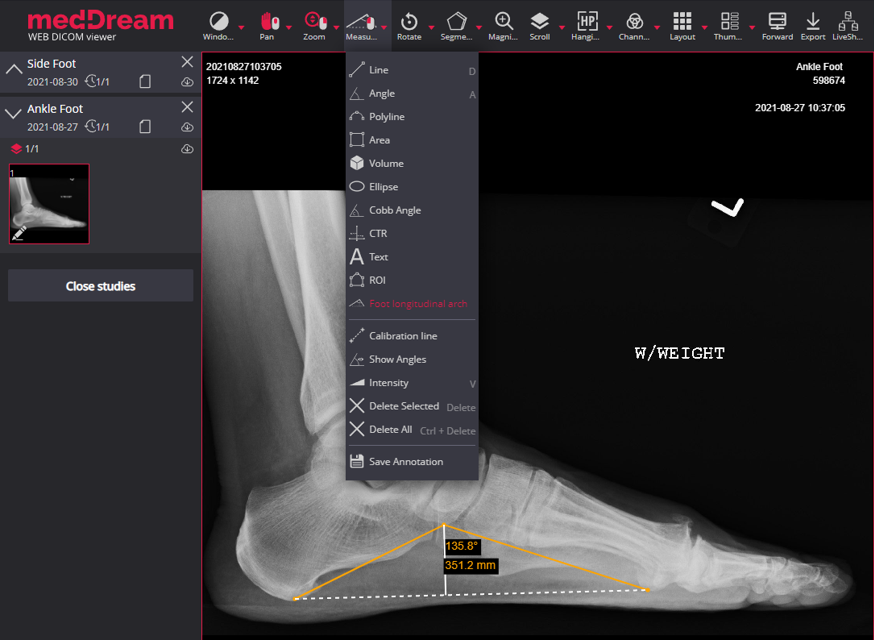
Foot longitudinal arch measurement is used to measure the angle and height of the foot medial longitudinal arch and aids in the detection of the longitudinal flatfoot.
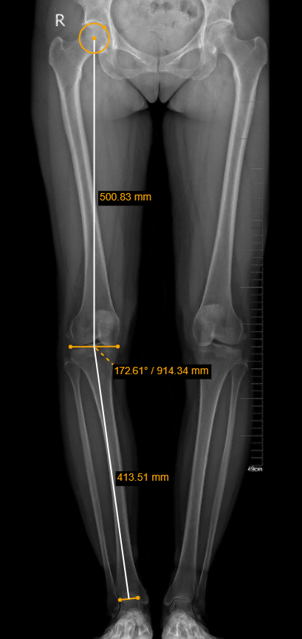
Toolbar > Measure > Goniometry. Measure the lengths of the femur, tibia, and femoral-tibial angular deformities:
Toolbar > Measure > TT-TG Distance. Measure the tibial tuberosity to trochlear groove distance for quantifying the knee patellar instability:

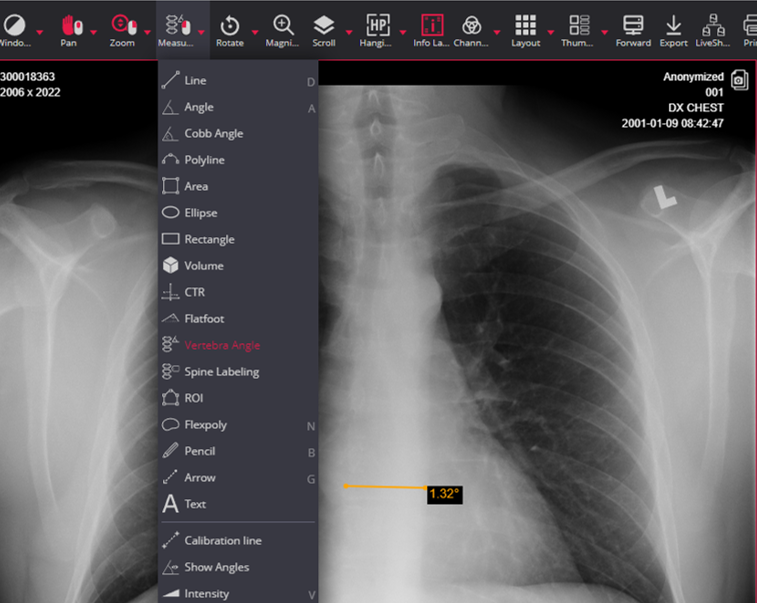
 Vertebra Angle
Toolbar > Measure > Vertebra Angle. Measure an angle between the user-drawn vertebra axis and the horizontal axis of the image:
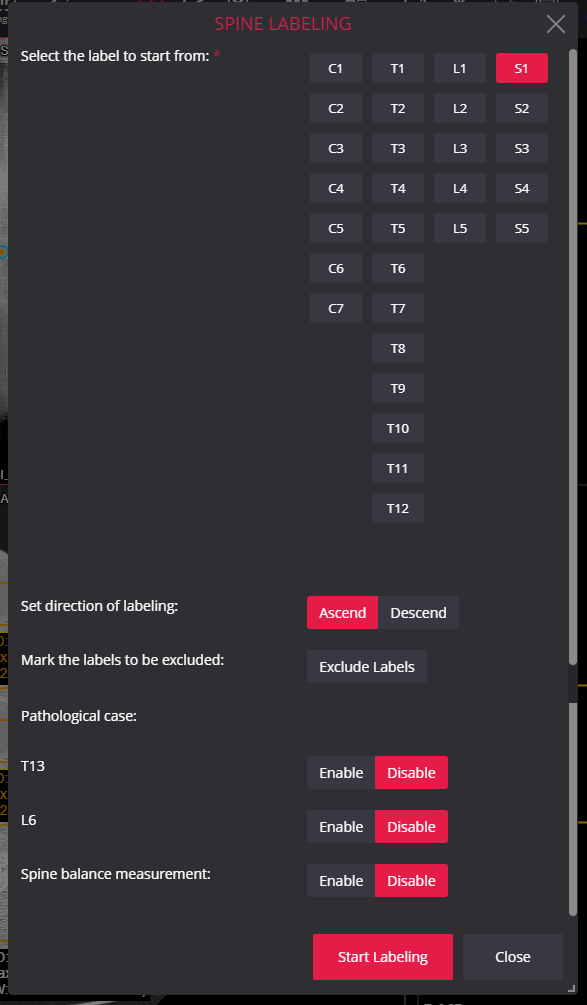
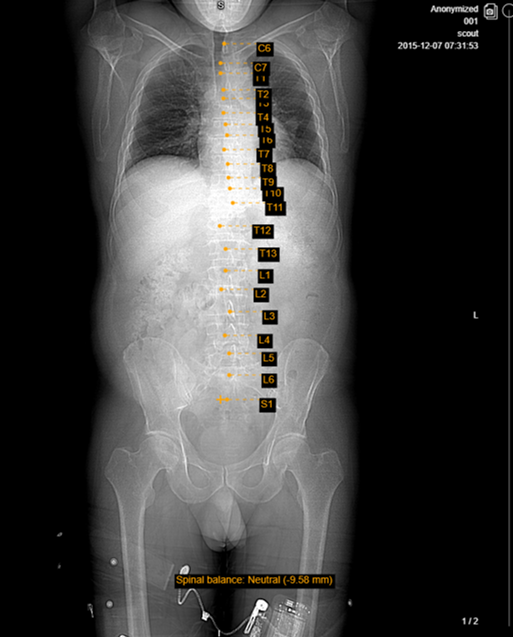
 Spine labeling
Toolbar > Measure > Spine labeling. Tool to mark the vertebrae of the spine. Despite of labeling the spine, user also can:
Watch the video tutorial on how to annotate the vertebrae of the spine with DICOM Viewer:
NOTE: Double click to finish labeling.
Toolbar > Measure > Time-Intensity curve. The measurement allows for visualization of the lesions’ behavior by plotting the ROI intensity values over time after the administration of contrast material:
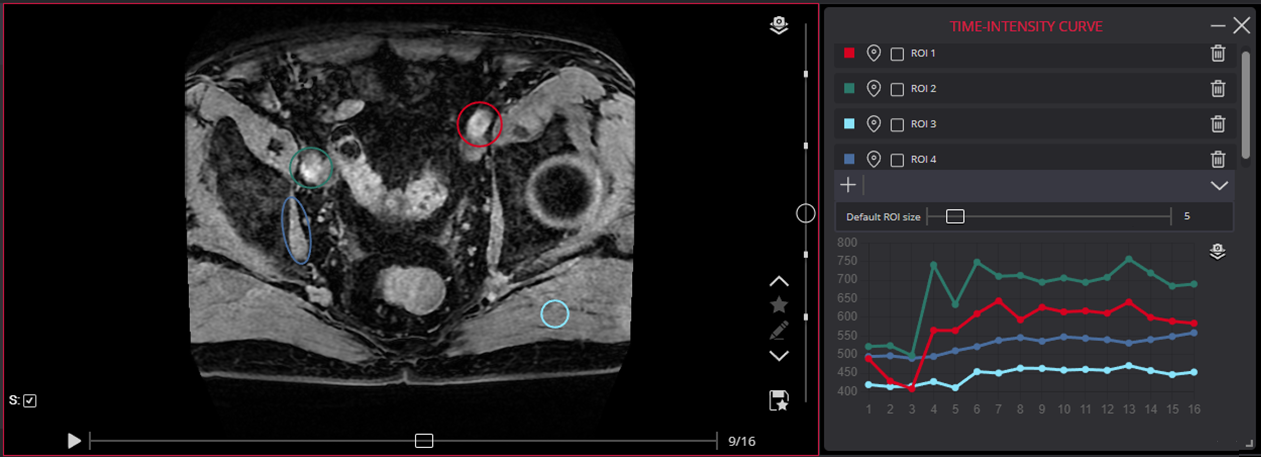
The Time-Intensity Curve ROIs and their information are not stored.
Watch the video tutorial on how to use Time-Intensity curve measurement with DICOM Viewer:
 ROI
ROI
Toolbar > Measure > ROI. Mark and store ROI (Region Of Interest) for study instance:
Watch the video tutorial on how to mark and store the ROI with DICOM Viewer:
Toolbar > Measure > Closed Polygon. Tool is used to mark the region of interest. As in case of ROI, the area is marked by placing the points around it, but the points are connected with curved lines.
Draw Closed Polygon:

Select the ROI:
Edit with Repulsor tool:

Read more about Repulsor tool here.
 Flexpoly
Toolbar > Measure > Flexpoly. Draw a flexible area on the images:
Watch the video tutorial on how to draw a flexible area on the image with DICOM Viewer:
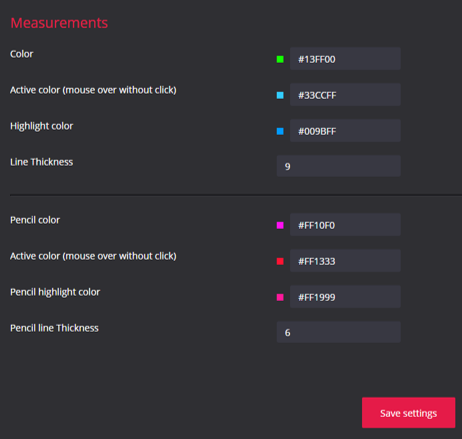
 Pencil
Toolbar > Measure > Pencil. Freely draw on the images:
Possibility to choose the color and line thickness of Pencil tool in Settings:
Watch the video tutorial on how to freely draw on the images with DICOM Viewer:
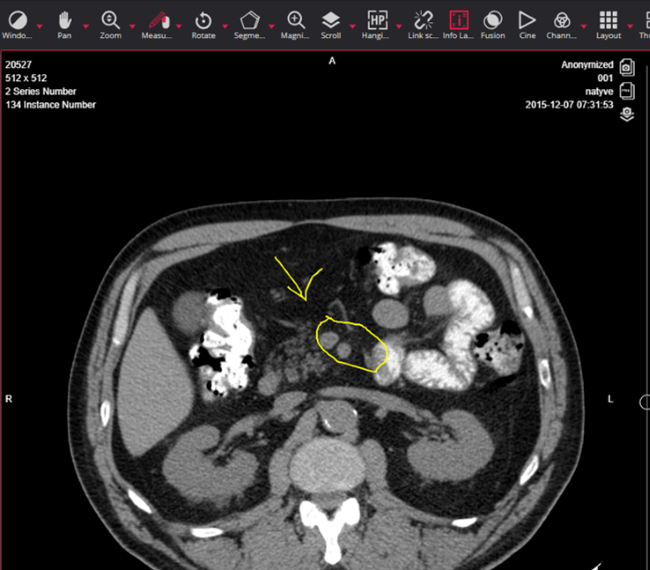
Toolbar > Measure > Arrow. Mark an area of interest on the image:
![]()
Watch the video tutorial on how to point an arrow to an area of interest with DICOM Viewer:
 Text
Text
Toolbar > Measure > Text. Text fields placed on the image for writing text notes:
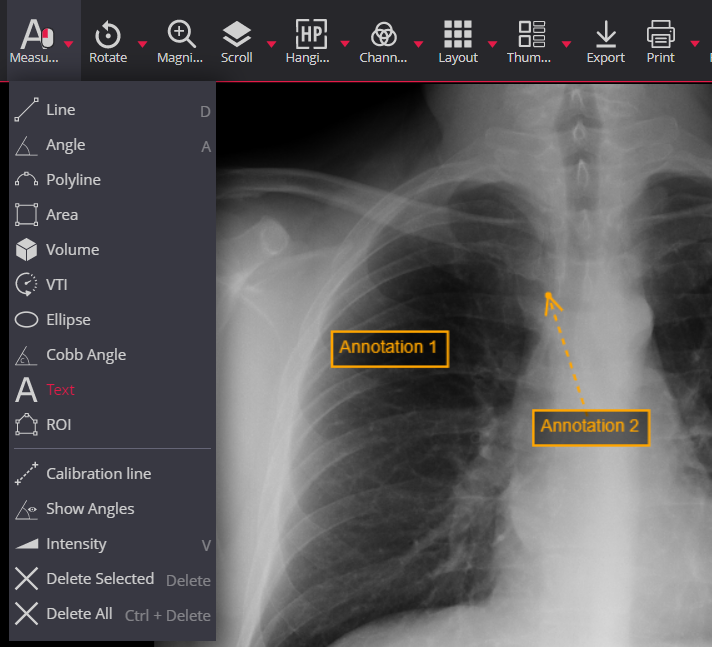
To insert the text box only simply click (Annotation 1). Text box with an arrow: click and drag (Annotation 2).
Watch the video tutorial on how to insert text notes with DICOM Viewer:
 Continuous measurement
Toolbar > Measure > Continuous measurement. Possibility to activate the tool in order to repeat measurements several times:
Toolbar > Measure > Repulsor. The tool to adjust Closed Polygon. To adjust the image scale and position, and click the selected mouse button near the line from the side you want to push. Hold the selected mouse button pressed and drag the Repulsor tool towards the line:
The system automatically adjusts the Repulsor radius according to the distance from the line. You can change the radius by holding the CTRL button and scrolling mouse wheel.
Read more about Closed Polygon here.
 Intensity
Toolbar > Measure > Intensity. The intensity function is used to measure the density of a CT image. Intensity is shown in Hounsfield units (HU) and its coordinates are displayed at the bottom left corner:
Watch a video tutorial demonstrating the intensity function and how to measure the density of a CT image:
 Show angles
Toolbar > Measure > Show angles. Measure the angle between intersecting lines, with the Show angles tool:
Watch video tutorial how to use show angles tool with DICOM Viewer:
 Ruler
Ruler
Toolbar > Measure > Ruler. Show the Rulers at the bottom and on the left side of the viewport:
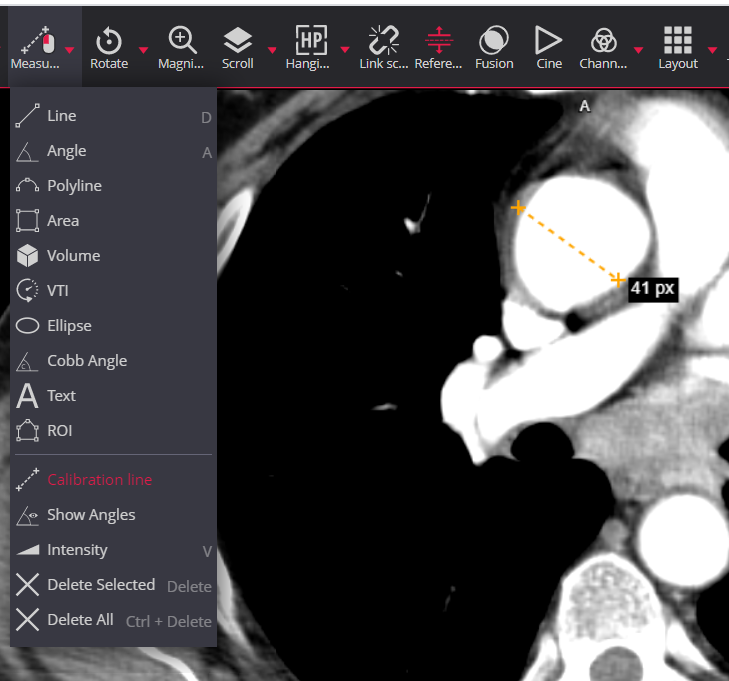
 Calibration line
Toolbar > Measure > Calibration line. Calibration line to change the scale of measurement:
Watch the video tutorial demonstrating the Calibration line tool:
 Delete
Toolbar > Measure > Delete. Delete is used to remove measurements of an active image:
Watch a video tutorial about how to delete measurements with DICOM Viewer:
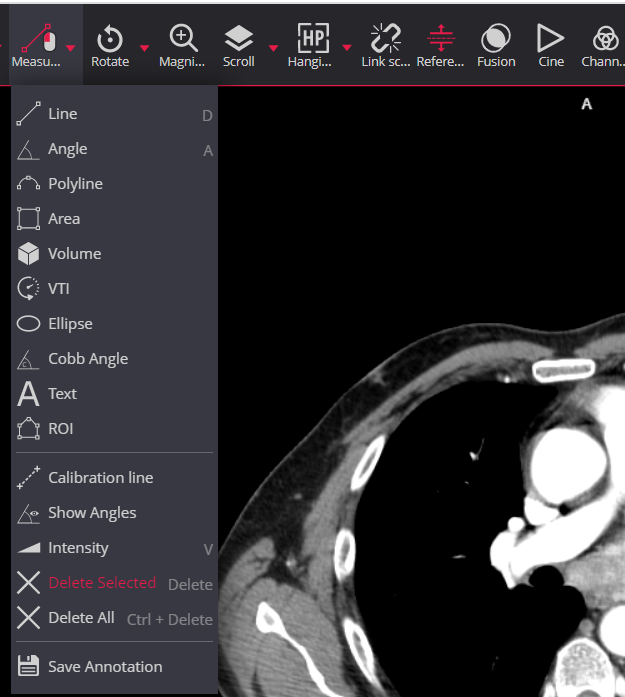
 Save annotation
Toolbar > Measure > Save Annotation. Save an annotation – saving measurements:
Watch the video tutorial on how to save an annotation with DICOM Viewer:
Please contact us directly to check if your PACS can support the saving annotations function.
© 2007. Softneta. All rights reserved.